Home » Products » Coating Inspection » Gloss / Appearance » Gloss Meters » Elcometer 480 Gloss Meters
Elcometer 480 Gloss Meters
Product Description
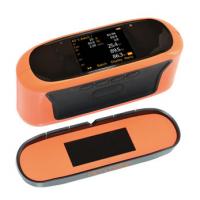
The Elcometer 480 range of handheld glossmeters combine accuracy, repeatability and reproducibility with functionality allowing you to measure Gloss, % Reflectance & Haze with ease.
Using state-of-the-art design and manufacturing techniques, the Elcometer 480 Glossmeters quickly and accurately measure and record gloss measurements on a wide range of materials, including paint, plastic, ceramic or metal.
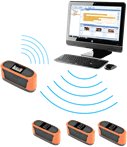
The Elcometer 480 gloss meter rapid LED technology accurately measures up to 3 gloss angles at the same time at a rate of 10 readings per second. Gloss measurements can be instantly transferred from the glossmeter to PC, iPhone, Android™ or other mobile devices via USB or Bluetooth®.
Using the ElcoMaster® software, professional reports for gloss and other appearance measurements can be quickly generated.
Alternatively gloss meter readings can be combined with other key measurement parameters such as coating thickness, adhesion and oven temperature profile – within the same software package.
Small, robust and ergonomic, the Elcometer 480 glossmeter range of gloss meters have been designed to exceed the demands of industry today.
Features of the Elcometer 480 Glossmeter
- Small, robust & ergonomic
- 3 – 10 readings per second
- Repeatable, reproducible & accurate
- Multiple angles – 20°, 60°, 85°
- 40,000 reading memory in up to 2,500 batches
- Date and time stamped readings
- USB & Bluetooth® data output
- PC, iPhone or Android™ compatible
- Automatic gauge & tile diagnostics
- Auto calibration tile recognition via RFID (Radio Frequency Identification; patent applied for)
- 40 user definable limit standards
- Standard, auto repeat and scan modes
- Differential mode with pass/fail
|
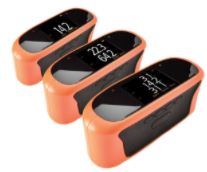
The Model Range The Elcometer 480 Glossmeter is available as either a simple entry level 60° glossmeter or state of the art Single, Dual or Triple angle gloss meter variants. The Elcometer 480 Glossmeter is available with (Model T) or without (Model B) memory. The Elcometer 480 Model B gloss meter is a 60° unit, Model T gloss meters are available as single, dual or triple angle variants with %Reflectance and Haze. |
 |
.Accuracy & Repeatability
Advanced electronics and a superior optical design combines highly accurate, repeatable and reproducible measurements with industry leading inter-instrument agreement – across its entire 0-2,000GU range.
| Range | 0-10GU | 10-100GU | 100-2000GU |
| Repeatability | ±0.1GU | ±0.2GU | ±0.2% |
| Reproducibility | ±0.2GU | ±0.5GU | ±0.5% |
Calibration and Diagnostics
| Every Elcometer 480 Gloss Tile is fitted with an RFID (radio frequency identification) tag which allows automatic identification of the tile’s serial number and calibration data when the tile is attached to the base of the gauge.Additional calibration tiles are available from the range of Elcometer 480 accessories | 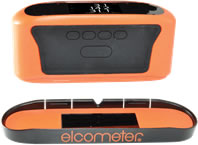 |
Measurement Speed
The Elcometer 480’s rapid LED technology accurately and repeatably measures up to 3 angles at the same time.
| Standard Mode | 1+ reading per second, (70+ readings per minute); < 0.3 seconds per angle |
| Auto Repeat Mode | 3 readings per second, (180 readings per minute); ~ 0.1 seconds per angle |
| Scan Mode | 10 readings per second, (600 readings per minute); ~ 0.03 seconds per angle |
Display Modes
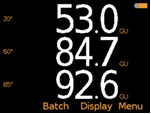
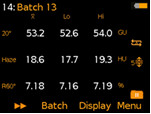
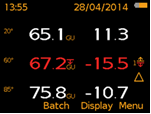
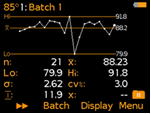
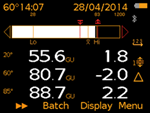
Fully customisable, scratch and solvent resistant colour LCD allows the user to display:
- Gloss, % Reflectance or Haze readings
- Statistics
- Readings and Differential with pass/fail
- Trend Graph
- Analogue Scan Bar
 |
 |
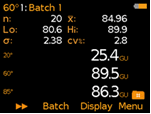 |
| Triple angle readings | Gloss, Haze & %Reflectance | Readings & user selectable statistics |
 |
 |
 |
| Readings & differential – pass / fail |
Run chart & statistics | Readings & differential with analogue scan bar |
Standard, Auto Repeat & Scan Modes
No two inspections are the same. It is for this reason that the Elcometer 480 is equipped with three measurement modes:
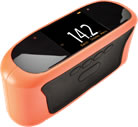 |
Standard Mode: Press the measure button to take an individual spot measurement. |
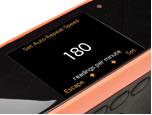 |
Auto Repeat Mode: When the glossmeter is slid over the surface a measurement of all three angles is automatically taken at a user definable rate between 10 – 180 readings per minute. When enabled all the individual readings are stored into memory. |
 |
Scan Mode: As the glossmeter slides over the entire surface area the gauge measures all three angles at a continuous rate of 10 readings per second. When stopped, the gauge displays and stores the average, highest and lowest values – ideal for checking a sample’s overall uniformity. |
Memory and Batching
| Store 40,000 date and timed stamped readings in up to 2,500 user definable alpha-numeric batches. Readings can be transferred to PC, iPhone, Android™ or other mobile devices via USB or Bluetooth® for instant reporting using ElcoMaster® software |  |
Limit Standards and Differential Mode with Pass / Fail
|
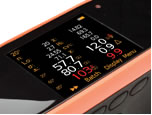
When visual appearance is critical Master Standards are created. These are generated and approved by the customer and then used by manufacturers as part of their quality control inspection regime. As these Master Standards have been visually approved they often do not have numerical gloss values assigned. In order to avoid subjectivity between inspectors, the Elcometer 480 can automatically generate and store the nominal (target), highest & lowest acceptable gloss values (Limits) from the Master Standard. Up to 40 Limits for each customer’s Master Standards can be stored within, and recalled from, the gauge’s ‘Limit Standard’ memory. When Limit Standards are used in combination with the gauge’s Differential Mode, the Elcometer 480 displays the measurement value together with the difference from the nominal (target) value. Readings outside the Limit Standard are displayed in red, providing quick Pass/Fail analysis. Due to the Elcometer 480’s industry leading inter-instrument agreement, once a Master Standard Limit has been created, the gauge can transfer these values to other Elcometer 480 glossmeters, via the ElcoMaster® software’s Library of Limit Standards, at any time. Information from multiple glossmeters can be combined into a single inspection report within ElcoMaster®, ideal for multiple production and assembly lines. |
 |
Create instant reports with ElcoMaster®
What you do with the collected data is just as important as taking the readings themselves.
ElcoMaster® is a fast, easy to use software solution for all your data management and quality assurance needs, preparing professional inspection reports at the click of a button.
Data transferred to ElcoMaster® includes;
- 20° 60° & 85° Gloss Units (GU)
- Haze Unit (HU)
- % Reflectance (%)
- Date & time for each reading
- Limit Standard values
- Batch information & statistics
- Calibration information including date/time, serial number & tile values
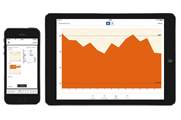
Whether you are in the field or on the factory floor, using the ElcoMaster® Mobile App users can;
- Store live readings directly on to a mobile device and save them into batches
- View graphs in real-time whilst carrying out the inspection
- Add notes to individual batch reading
- Add photographs of the test surface to each individual batch reading at the click of a button
- Plot individual readings on to a location Map photograph or diagram via the mobile device’s internal GPS
- Inspection data can be transferred from mobile to PC for further analysis and reporting
- Generate instant .pdf report for submission
The new ElcoMaster® is a fast, easy to use software solution for all your reporting requirements
 |
 |
 |
The Elcometer 480 Gloss Meter can be used in accordance with the following Standards:
- AS/NZS 1580.602.2
- ASTM C584
- ASTM C523
- ASTM D523
- ASTM D1455
- ASTM D2457
- ASTM D4039
- ASTM D4449
- ASTM D5767
- ASTM E430
- ASTM E2387
- BS 3900 D5
- DIN 67530
- ECCA T2
- EN 12373-11
- EN 13523-2
- ISO 7668
- ISO 2813
- ISO 13803
- ISO 17025
- JIS K 5600-4-7
- JIS Z 8741
- TAPPI T 653 (20°)
Standards not in bold have been superseded but are still recognised in some industries.
Specifications
Elcometer 480 Gloss Meters – Specifications
| Product Features | Model B | Model T | |
| Measurement geometries | 60° | 60°, 20/60° or 20/60/85°* | |
| Measurement units | GU | GU, HU† & % | |
| Fast, accurate reading rate | ■ | ■ | |
| Repeatable & reproducible measurements | ■ | ■ | |
| Easy to use menu structure; in 30+ languages | ■ | ■ | |
| Tough, impact, waterproof & dust resistant | ■ | ■ | |
| Scratch & solvent resistant colour display; 2.4” (6cm) TFT | ■ | ■ | |
| Rotating display: auto, 0°, 180° | ■ | ■ | |
| Ambient light sensor; with adjustable auto brightness | ■ | ■ | |
| Data output | |||
| USB live readings | ■ | ■ | |
| USB batch download | ■ | ||
| Bluetooth®: to PC, iOS or Android™ mobile devices | ■ | ||
| USB & battery powered | ■ | ■ | |
| Calibration Certificate | ■ | ■ | |
| Manual gauge calibration | ■ | ■ | |
| Auto gauge calibration; via RFID tagging of integrated calibration tile# | ■ | ||
| On screen statistics – user selectable | |||
| Number of readings, Mean (average), Standard deviation, | ■ | ■ | |
| Highest reading, Lowest reading, Range | ■ | ||
| Coefficient of variation, | ■ | ||
| Nominal value, High Limit value, Low Limit value | ■ | ||
| Number above high limit, Number below low limit | ■ | ||
| Measurement modes | |||
| Standard Mode | ■ | ■ | |
| Auto Repeat Mode; programmable 10-180 readings per minute | ■ | ||
| Scan Mode; 10 readings per second | ■ | ||
| Differential Mode with Pass/ Fail mode; | ■ | ||
| Limit Standards; up to 40 programmable standards | ■ | ||
| Gauge & batch specific standard limits | ■ | ||
| Gauge memory 40,000 readings in up to 2,500 batches | ■ | ||
| Alpha-numeric batch names | ■ | ||
| Fixed batch size mode | ■ | ||
| Date and time stamp | ■ | ||
| Gauge auto diagnostics | ■ | ■ | |
| Display modes; user selectable | |||
| Readings; gloss, % reflectance†, haze† | ■ | ■ | |
| Selected statistics | ■ | ■ | |
| Live trend graph; last 20 readings | ■ | ||
| Scan bar | ■ | ||
| Readings & differential (with pass/fail) | ■ | ||
| Delete last reading | ■ | ■ | |
| 2 year extended warranty | ■ | ■ | |
| Model Options | |||
| Part Number | Description | Certificate | |
| J480B-6 | Elcometer 480 Model B 60° Glossmeter | ● | |
| J480T-6 | Elcometer 480 Model T 60° Glossmeter | ● | |
| J480T-26 | Elcometer 480 Model T 20/60° Glossmeter | ● | |
| J480T-268 | Elcometer 480 Model T 20/60/85° Glossmeter | ● | |
| Technical Specification | |||
| Display information | 2.4” (6cm) QVGA colour TFT display, 320 x 240 pixels | ||
| Power | USB (via PC) or 2 x AA batteries (~50,000 readings) | ||
| Measurement Dimensions | 20°: 10 x 10mm; 60°: 8 x 16mm; 85°: 4 x 55mm | ||
| Measurement Range | 20°: 0 – 2,000GU; 60°: 0 – 1,000GU; 85°:0 – 160GU | ||
| Repeatability | ± 0.1GU (0 – 10GU); ±0.2GU (10 – 100GU); ±0.2%: 100 – 2000GU | ||
| Reproducibility | ± 0.2GU (0 – 10GU); ±0.5GU (10 – 100GU); ±0.5% 100 – 2000GU | ||
| Resolution | Gloss: 0.1 GU (0 – 100GU); 1 GU (>100GU) | ||
| % Reflectance: 0.01% (0 – 10%); 0.1% (10 – 100%) | |||
| Haze: 0.1 HU (0 – 100HU); 1 HU (>100HU) | |||
| Operating Temperature | -10°C to 50°C; Relative Humidity: 0 – 85%RH | ||
| Dimensions (H x W x D) | 68 x 155 x 50mm | ||
| Weight | 534g [including batteries] | ||
Packing List
- Elcometer 480 Glossmeter
- integrated calibration tile
- calibration certificate
- 2 x AA batteries
- wrist strap
- operating instructions
- plastic carry case
- ElcoMaster® software (Model T)
- USB cable (Model T)
Data Sheet
Standards
Elcometer 480 Gloss Meters – Standards
The Elcometer 480 Gloss Meter can be used in accordance with the following Standards:
- AS/NZS 1580.602.2
- ASTM C584
- ASTM C523
- ASTM D523
- ASTM D1455
- ASTM D2457
- ASTM D4039
- ASTM D4449
- ASTM D5767
- ASTM E430
- ASTM E2387
- BS 3900 D5
- DIN 67530
- ECCA T2
- EN 12373-11
- EN 13523-2
- ISO 7668
- ISO 2813
- ISO 13803
- ISO 17025
- JIS K 5600-4-7
- JIS Z 8741
- TAPPI T 653 (20°)
Standards not in bold have been superseded but are still recognised in some industries.
Accessories
Elcometer 480 Gloss Meters – Accessories
| Part Number | Description | Certificate | |
| T48024798-LC | Low Gloss Calibration Tile | Nominal Value: 22GU at 60° | ● |
| T48024798-MDC | Mid Gloss Calibration Tile | Nominal Value: 55GU at 60° | ● |
| T48024798-H | High Gloss Calibration Tile* | Nominal Value: 97GU at 60° | |
| T48024798-HC | High Gloss Calibration Tile | Nominal Value: 97GU at 60° | ● |
| T48024798-MRC | Mirror Gloss Calibration Tile | Nominal Value: 1900GU at 20° | ● |
| T48024798-SH | Soft Material Specimen Holder, complete with 3 sample trays | ||
| T48025004 | Soft Material Sample Trays (x3) | ||
| T99923535 | Gloss Tile Cleaning Cloth | ||
| T99925002 | USB Cable | ||
Why Measure Gloss
Elcometer 480 Gloss Meters – Why measure Gloss?
Why measure Gloss?
|
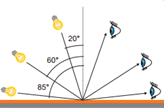
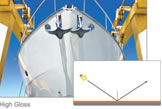
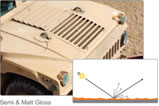
Visual appearance can determine a person’s perception of a product. Perception is subjective. A key measurement parameter used to define and quantify a product’s overall visual quality is gloss. Gloss is measured by directing a constant intensity light beam, at a fixed angle, on to the test surface and then monitoring the amount of reflected light from the same angle. This specular reflectance is measured using a glossmeter. Different surfaces require different reflective angles. High Gloss Surfaces with a brilliant or highly polished finish reflect images clearly. This distinct reflection is caused by the incident light reflecting on the surface in a specular direction. Semi & Matt Gloss Surfaces reflect images less distinctly and with reduced intensity. On semi or matt surfaces light not only reflects in a specular direction but also is scattered causing the reflected image to appear diffused. Choosing the correct angle for gloss measurement Gloss measurement is based on the amount of light reflected on the surface relative to a polished glass reference standard, measured in Gloss Units (GU). The amount of light that is reflected on the surface is dependent on the angle of incidence and the properties of the surface. Gloss is categorised as either matt, semi or high gloss. In order to determine the most appropriate measurement angle start with a glossmeter set at a 60° angle of incidence. If the result is between 10 – 70GU, the coating is termed ‘semi-gloss’ and should be measured using the 60° angle. If the result is less than 10GU, the product is ‘low gloss’ and should be measured using the 85° angle and if it is greater than 70GU, the product is known as ‘high gloss’ and should be measured using the 20° angle. All three angles should be recorded (20, 60 & 85°) when measuring gloss on anodised metals to ensure a complete understanding of the specular reflectance between the coating and the metal substrate.
% Reflectance compares the amount of light energy transmitted and received by a glossmeter and expresses the value as a percentage. The shinier a surface is, the closer the value will be to 100%. Haze (HU) Haze causes a drop in reflected contrast and causes ‘halos’ to appear around the reflected light sources, dramatically reducing the visual quality. In accordance with ASTM D4039 haze is defined as the numeric difference between the specular reflectance at 60° and 20°. |
         |

